611
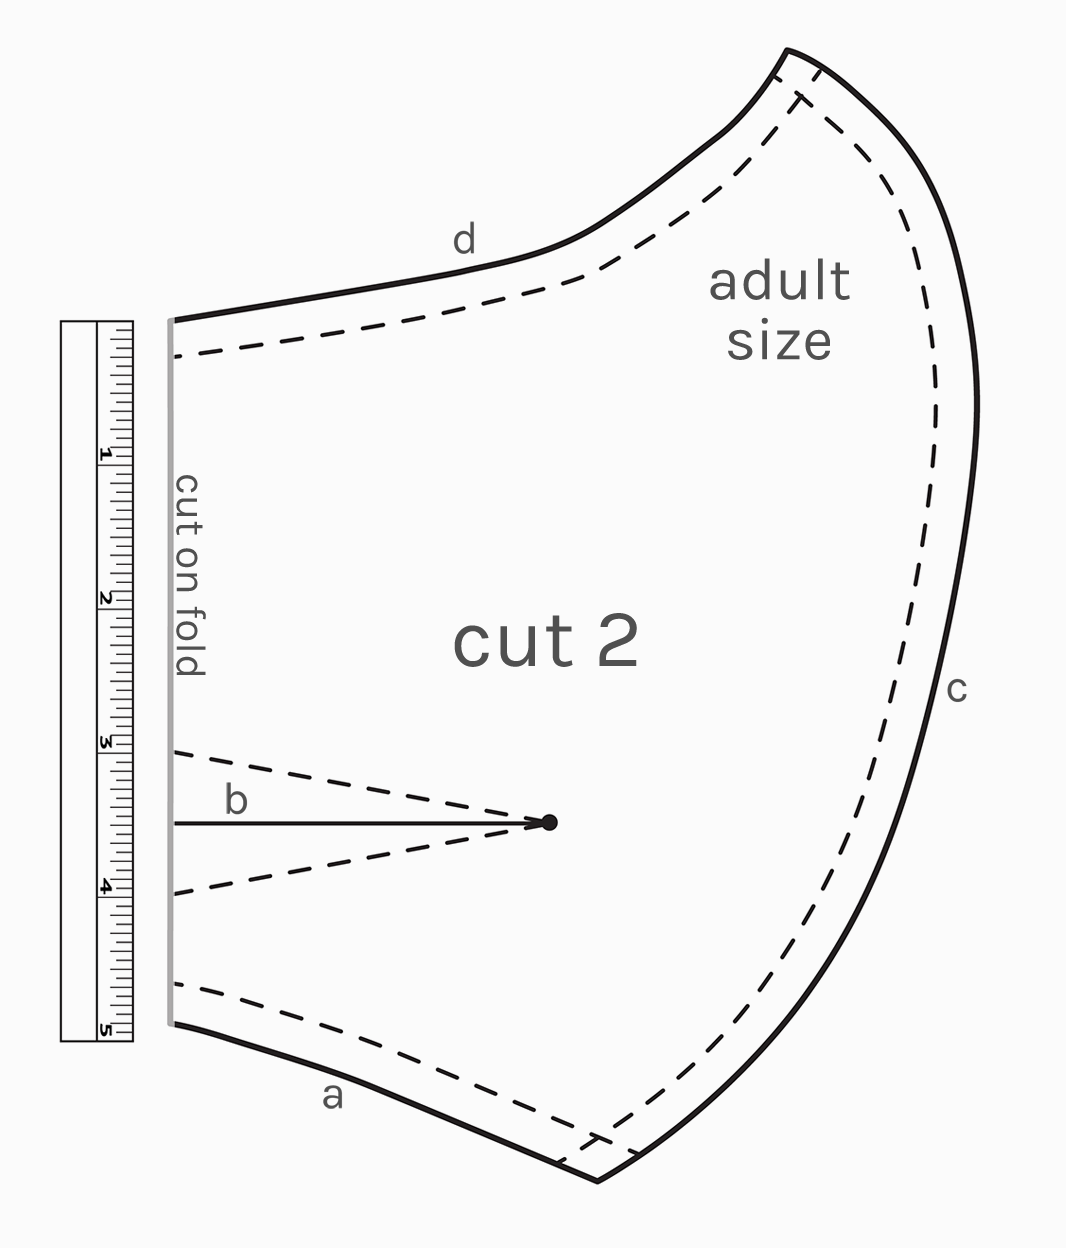
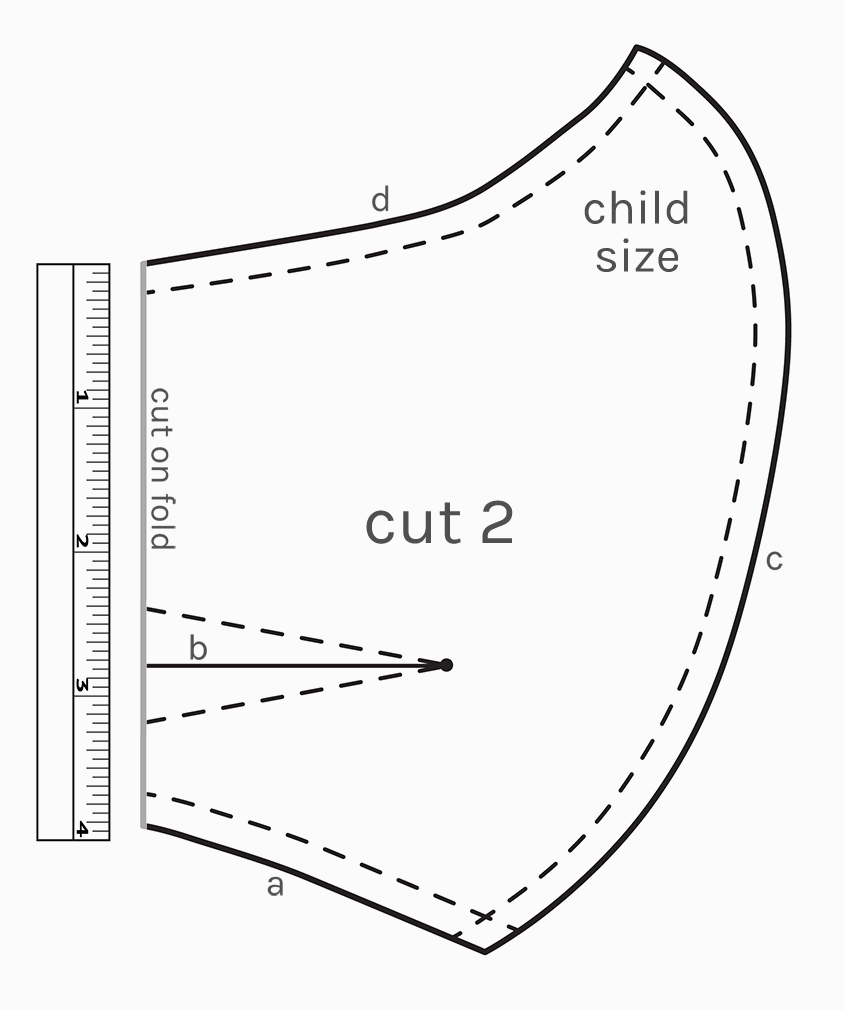
The base mask is sewn identically for both versions (ties or elastic). For a single mask, cut 2 pieces with indicated side on fold. No need to mark seam allowances—simply place needle in center of presser foot & align fabric edge with presser foot edge.
Pattern is suitable for all skill levels, and there is zero precision work.
Always anchor your stitches unless otherwise noted: sew forward a few stitches, backward a few, and then continue. Mask needs to hold up to frequent washing.
Please use a 100% cotton, woven fabric in a solid color or with a very subdued, regular pattern:

The goal is that the mask should be able to be worn every day, and never clash with a recipient's attire or taste preferences, regardless of gender or style.
The nose wire you'll want to use is a 16-gauge wire (pipe cleaners are pointless, so don't use those). Twist the ends over using needle-nose pliers so the wire won't puncture the fabric. You'll ship the masks folded in half, so you will not insert the wire, but include in the package for recipients to insert themselves.
INSTRUCTIONS
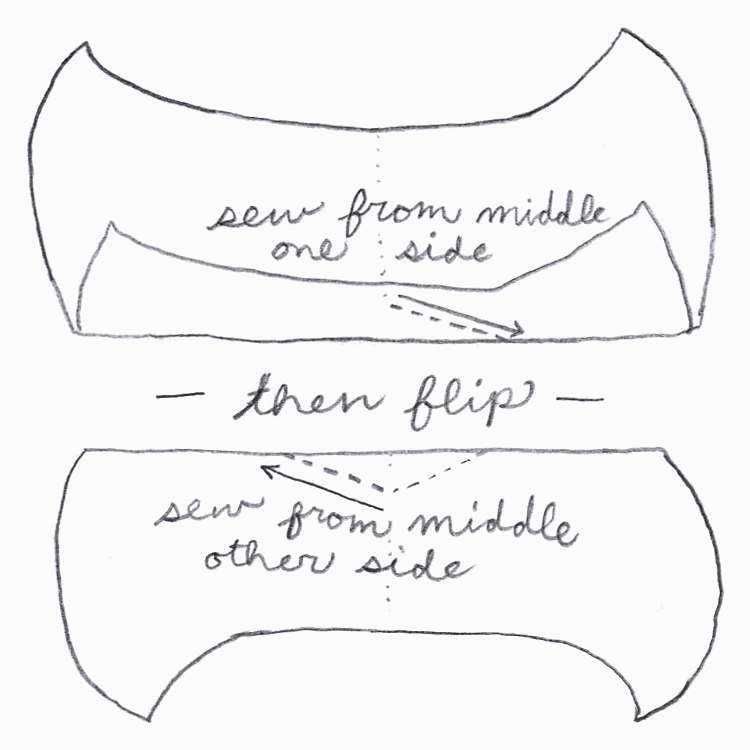
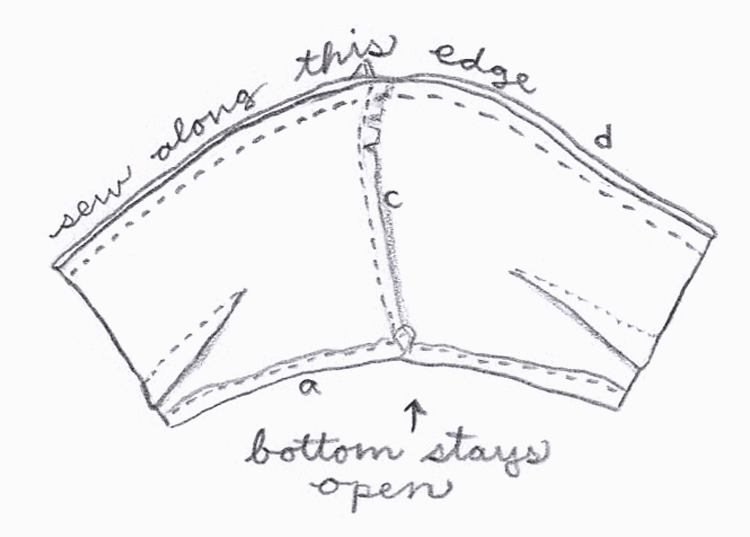
1: Make sure you've traced the dart marks onto both sides of the fold, so you have a diamond. Poke hole in pattern piece at circle to mark diamond point on fabric.
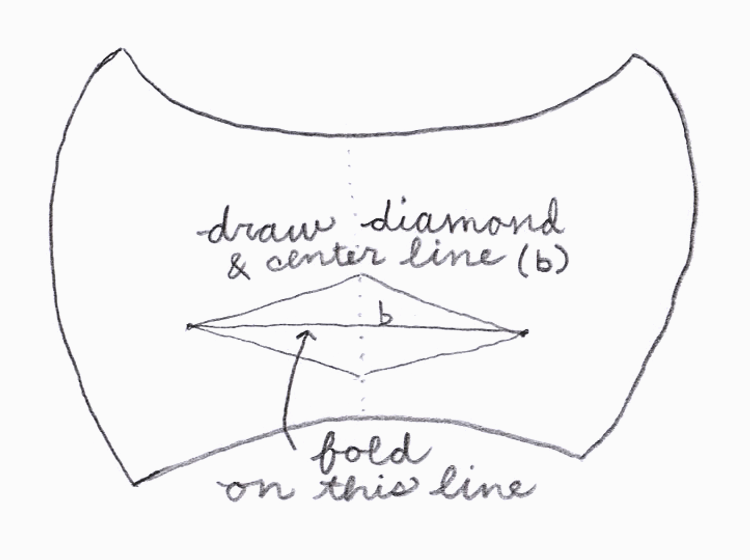
Unfold the fabric, then fold along line b, the diamond's center line. Sew along the outer (dotted) diamond lines. It is significantly easier to sew from the middle to one point, then flip it over and repeat. Do this with both pieces separately (you are not attaching them yet).
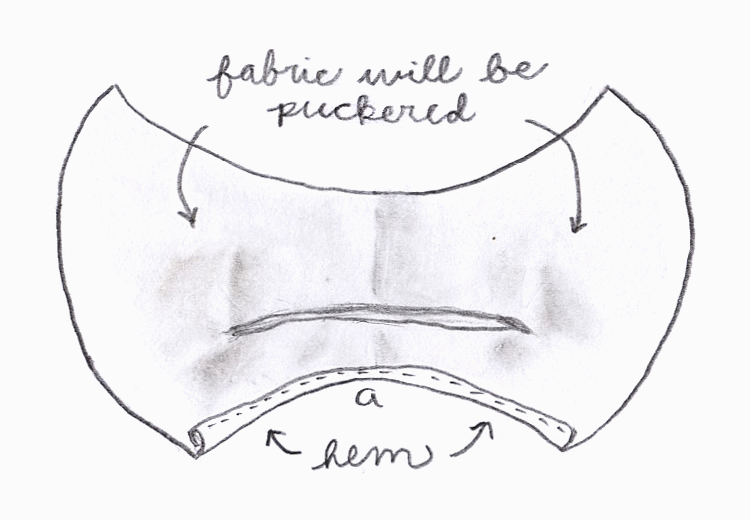
2: Hem each piece along edge a. Fold over twice, keeping each fold as narrow as possible (crease with your fingers, or use an iron if you prefer). This is the hardest step since this hem is along a slight curve, which can be finicky. So when you're done with this step, relax—the rest is super easy. You can fold it over once, sew it, then fold it a second time, and sew again, if that's easier. Do this with both pieces separately (you are not attaching them yet).
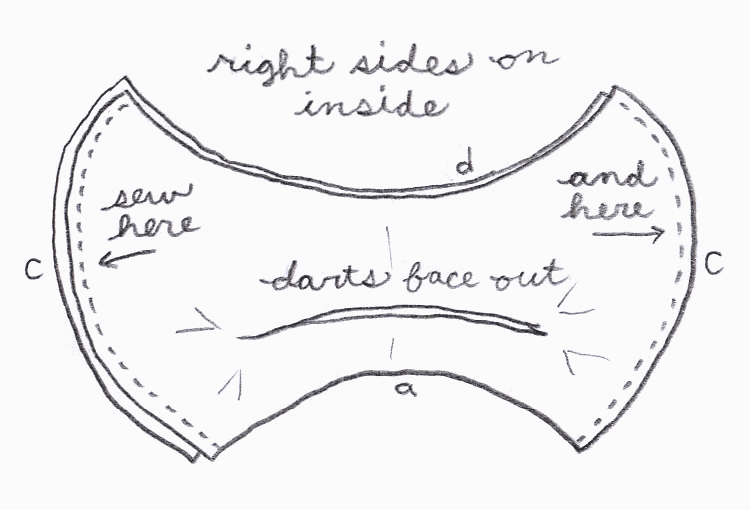
3: Place your two pattern pieces together, with wrong side facing out. Sew together along edge c, on both sides, symmetrically.
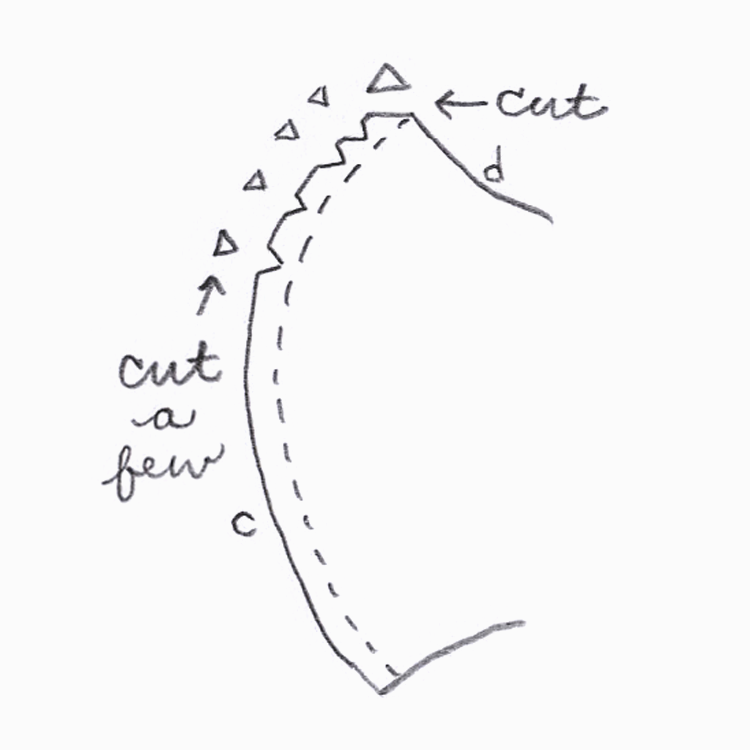
Cut a few little triangular notches out around the outer curve near the nose, being careful not to get too close to the seam. Trim the very tippy top corner (where edges c & d meet).
4: Align the two peaks of the nose seam with one another. You'll have one piece that's convex, and one concave. Try to line up all the edges nicely, so you can see the shape and alignment of the finished mask. Finally, sew along edge d, making sure the nose peaks are aligned. Ideally, push the seams in opposite directions (bottom one toward you, upper one away from you), easier to do if you slow down when you get to the center.
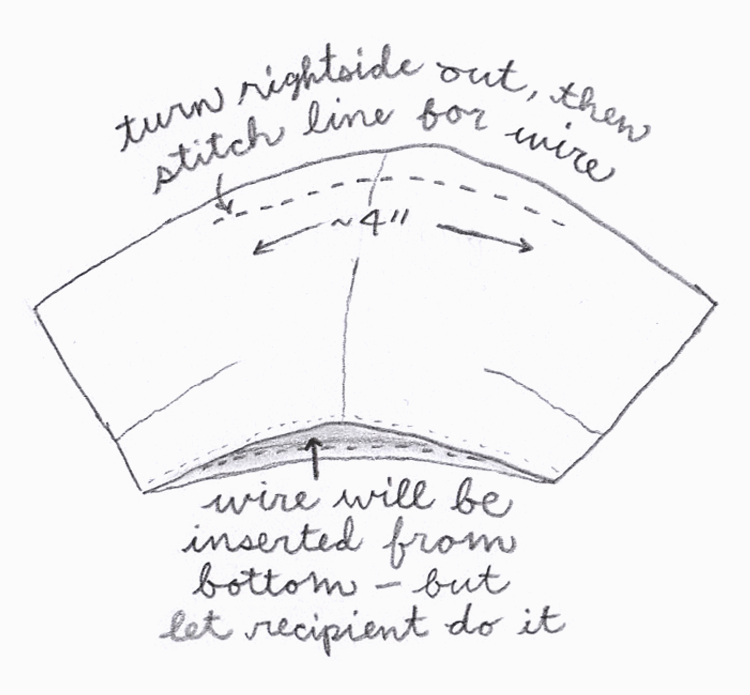
5: Turn the mask right-side out, poking out the corners and smoothing it out. Sew a single stitch line about 1/2" down from the nose, about 3-4" long, to hold a 16-gauge wire in place. Your base mask is done. *Even if you are unable to procure wire, still stitch the channel for the nose wire, in case recipients can find their own wire.
Mask with ties (type1 & type3):
6: You'll need long strips of fabric, about 1.5" wide. They need to be 42" long for the adult size, 36" long for the child size. The easiest thing to do is cut starter notches and then pull to rip your strips, which will rip in perfectly straight lines. If you're sewing many masks, it's a good idea to cut a length of fabric 42" long, and rip parallel strips for the entire width of the fabric.
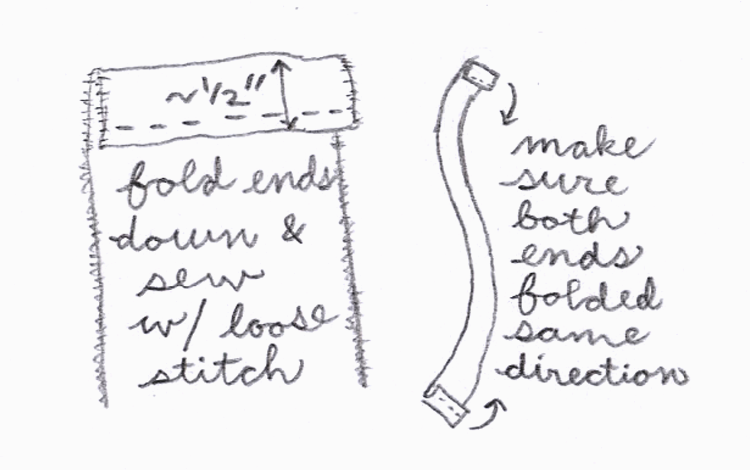
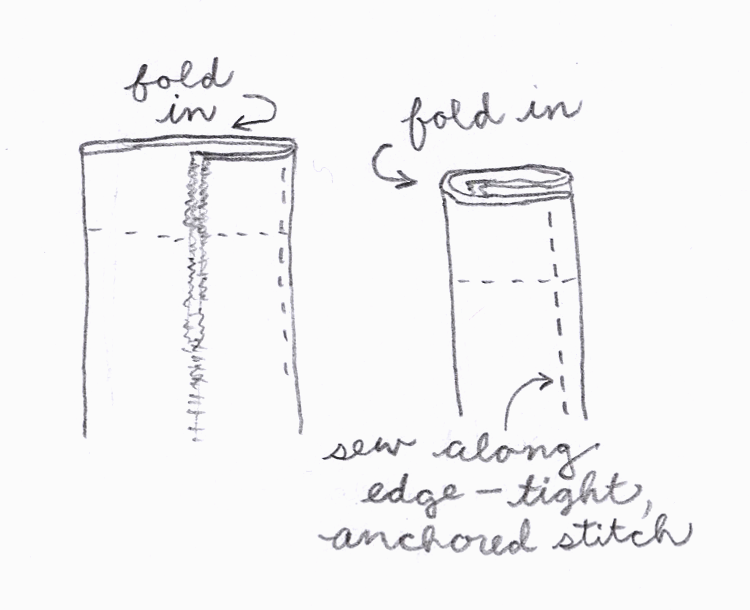
7: Fold the ends over about 1/2" and sew a loose stitch (no anchoring stitches needed here) to hold in place. Maker sure you fold both ends toward the same side of the fabric!
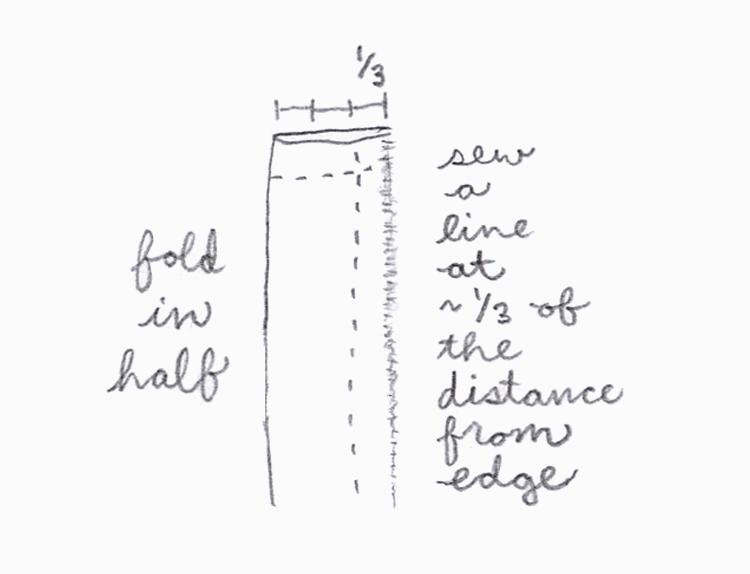
Then fold the strip in half along the length (folding the end hems inside) and sew a loose stitch the full length of the tie, about 1/3 of the way in from the (ripped) edges. This is not precision work. Somewhat wobbly, imperfect stitching is no biggie. Start by pinching together the ends and placing under the presser foot, then continue folding as you sew. If you try to fold the entire strip at the outset, it won't stay folded.
Now fold this strip in thirds, folding the ripped edge into the middle. Get a few inches of it folded, sew a little bit, then continue folding as you work your way along the tie. Use tight stitches and remember to anchor your stitches at the beginning and end. It's ideal if the stitch line can be closer to the edge, but a slightly wobbly stitch that meanders into the middle in places is fine. Just get as close as you can to the edges you're joining. Sew two ties for each mask.
8: Attach your ties to the sides of the mask. Mark each tie at the place it will connect to the top corner of the mask: 22" for the adult mask, 18.5" for the child mask. You want the ties at the top longer than at the bottom, since the upper ties go all the way around the head, but the bottom ties only behind the neck.
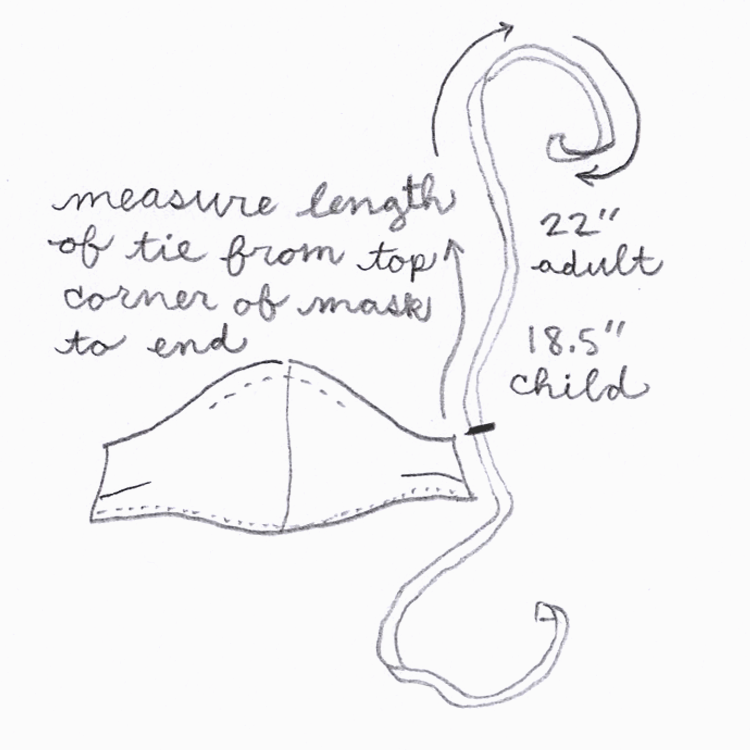
Sew along each edge of the tie, creating two stitch lines for a sturdy attachment, and be sure to double-anchor these stitches. Your mask is done!

Mask with elastic (type2):
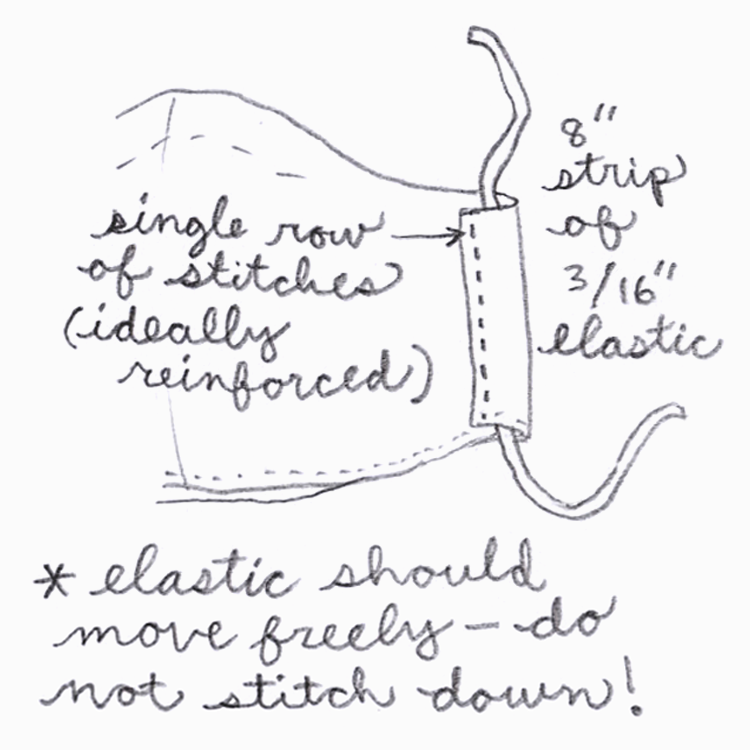
9: Cut two 8" pieces of soft, flexible, 3/16" elastic. Lay the flat piece of elastic down along the edge of the mask. Fold the edge of the mask over the elastic and sew a reinforced line to hold the elastic. Be sure NOT to let the stitch go through the elastic. The elastic should move freely. The mask recipient will knot the elastic to the proper length for their face, then rotate the knot under the seam. You may wish to include an extra two pieces of elastic in the package so when the elastic loses its stretch, the recipient can replace it (this is totally up to you)... Your mask is done!
If you would like more detail, check out our step-by-step guide with photos and videos for each step. The mask is so easy to make, you'll only need to reference this once, and after that you can sew it from the above steps or from memory, since there are so few steps and pieces involved.
Final step (optional):
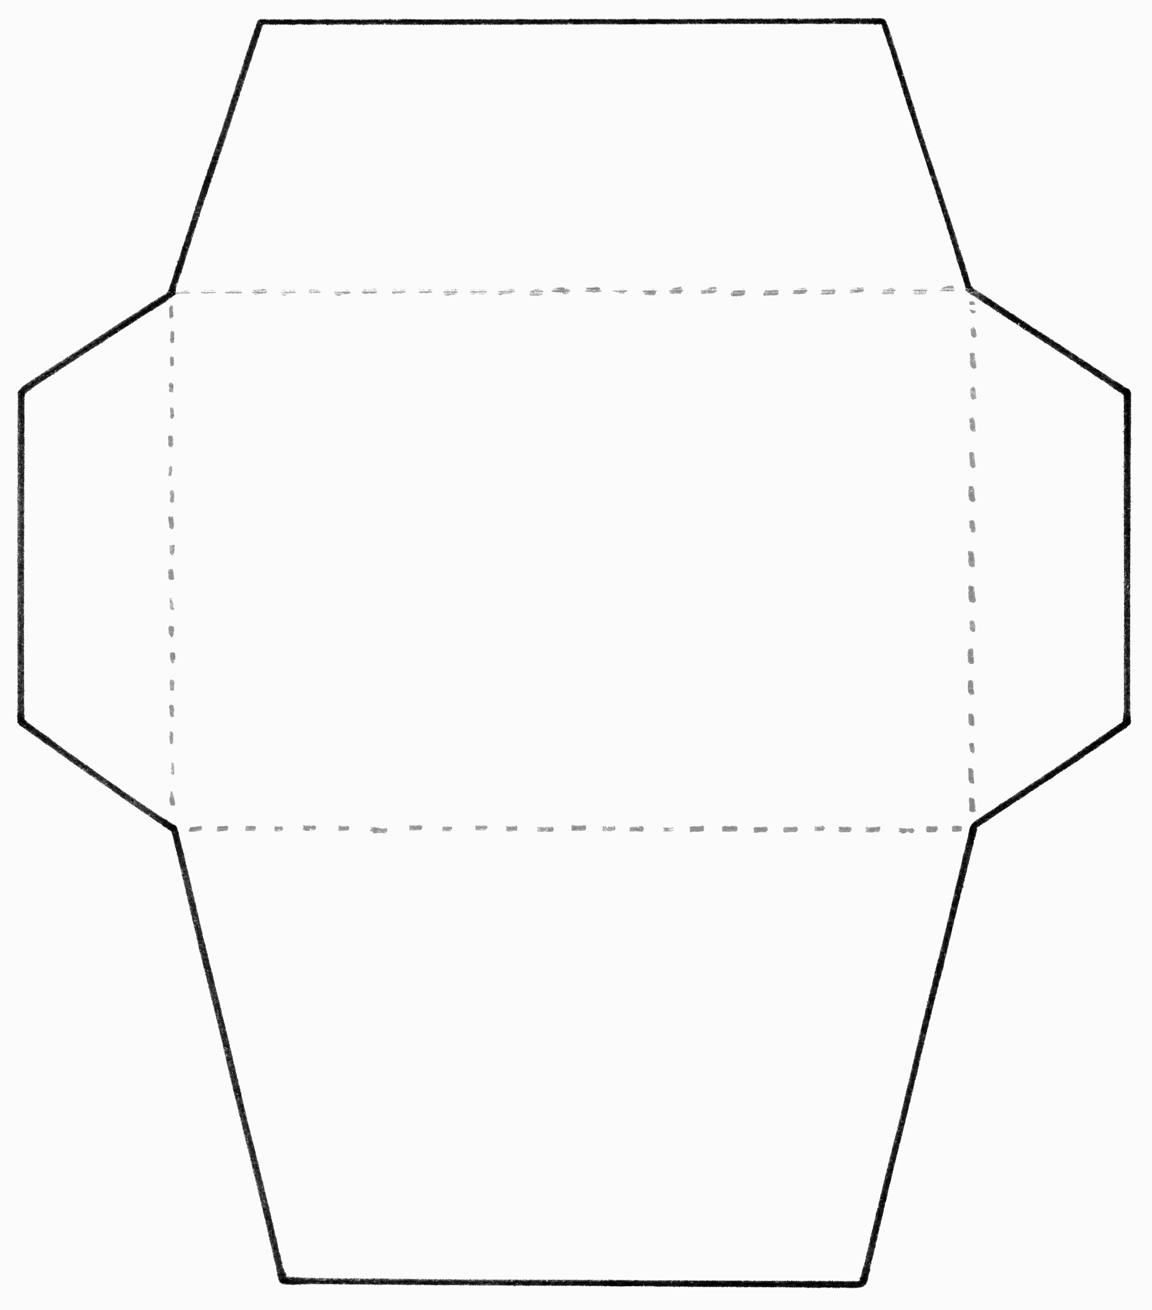
Use this envelope template to create an envelope from brown paper for each outgoing package. Fold in the sides, then the bottom, and tape along sides. Then fold down the top flap (recipient will tape). Add a stamp and address it to yourself. This is how your recipients will send you a note of thanks, possibly a photo, and (optional) donation—we suggest $5-10 per mask to help offset the cost of materials and shipping.